
How To Make Reusable Paper Towels:

Last week we posted about Mister Domestics Project Party and all the fun makes we got to create here. One of those were reusable paper towels, something that had been on our radar for quite some time. The only thing stopping us were using the little plastic snaps. Now that we actually made them it seems funny since they were SO EASY to do!!! I actually can’t wait to try them out on MORE projects!
Since we loved how ours turned out we wanted to make a little tutorial for you so that you could whip up your own. This is a great beginner sewing project and you can easily sew up a roll in a weekend!
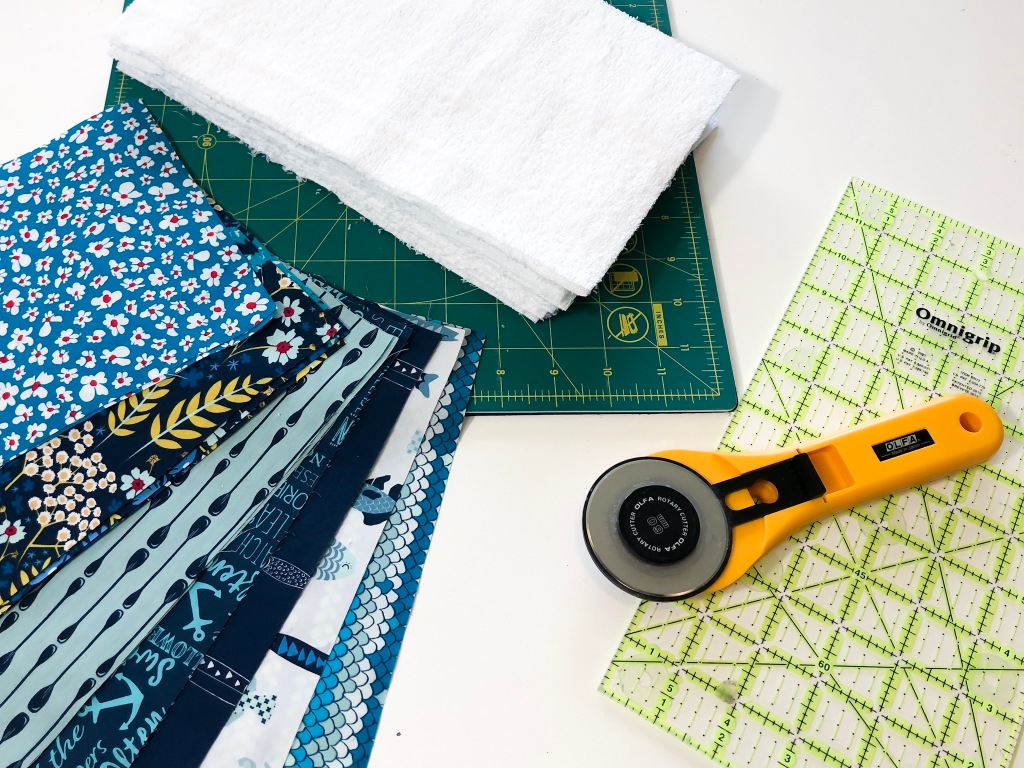
Materials you will need:
-Cotton Fabric (we used scraps) (Dimentions 6.5×11.5in)
-Plastic snaps (4 snaps per towel)
-Plastic snap pliers
-Thread
-Terry Cloth fabric (1yd makes 12)
-Ruler
-Rotary Cutter
-Frixion Pen
Here how to do it:
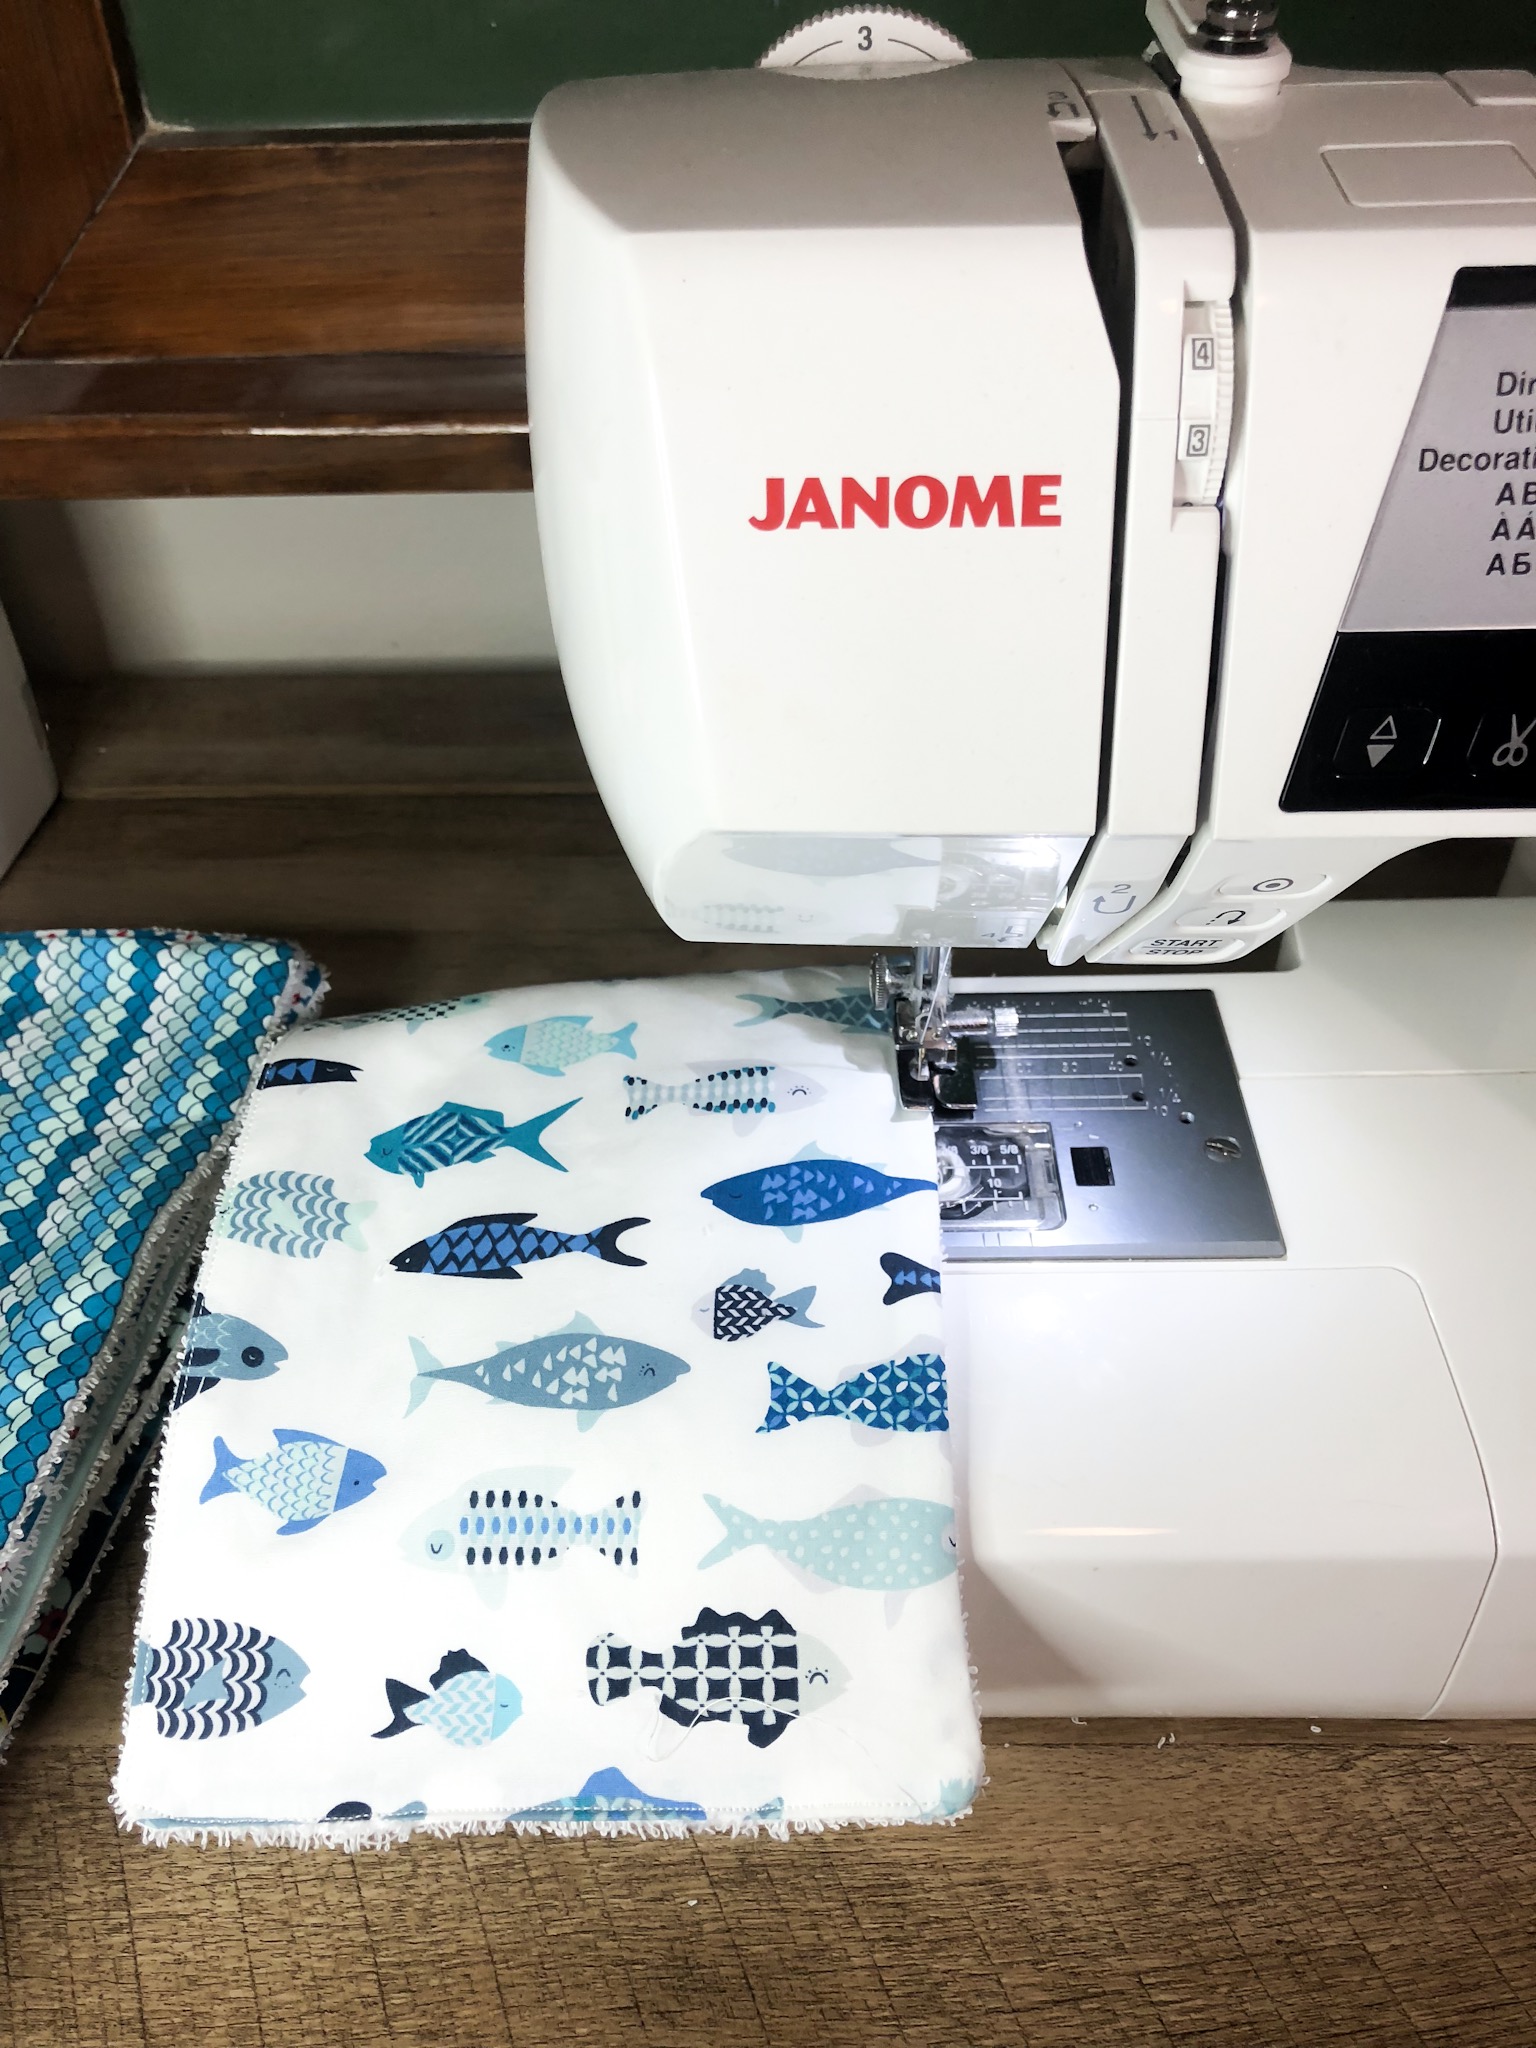
1. First you will need to cut your cotton fabric and your terry cloth into 6.5×11.5in size rectangles. I suggest using a rotary cutter for both but it is very helpful for the terry cloth since its messy and you can easily make a clean straight line.
Pro tip: Use a lint roller when you are done to clean up the left over fuzzies on your cutting table.
2. Next, sew your cotton and terry fabric rectangles right sides together using a 1/4in. seam allowance and leaving a 1.5 in. gap on one of the sides so that you can flip the fabric right side out.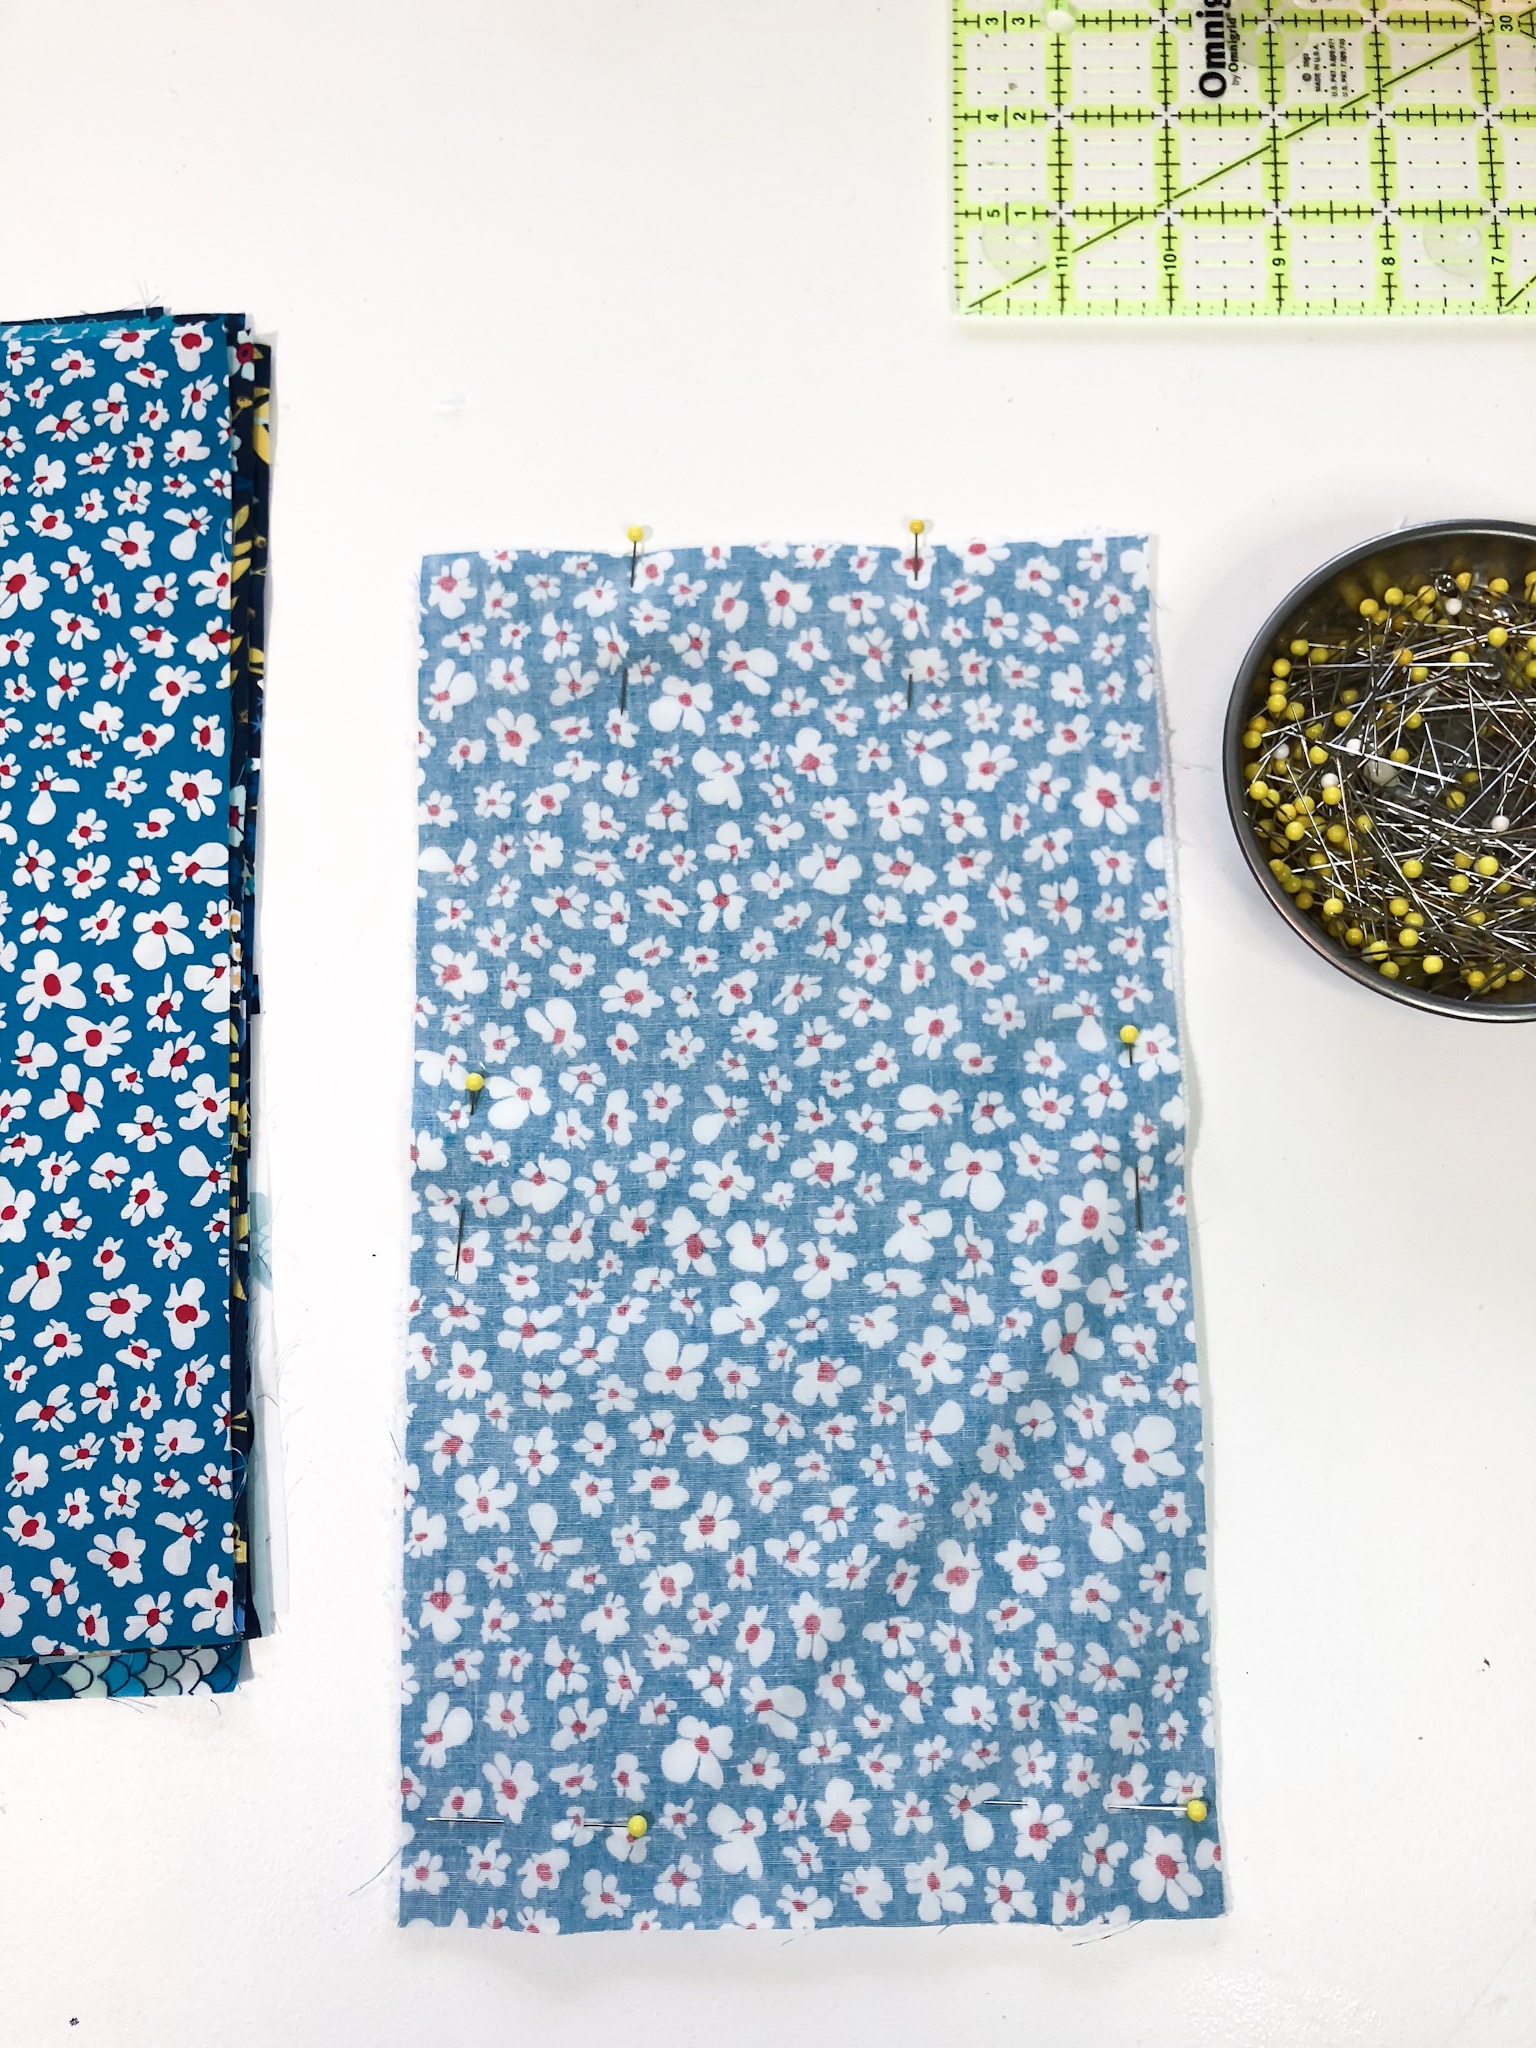
3. Turn your fabric right side out and finger press the seams flat. You can use a Purple Thang tool to help you get the corners pointy.
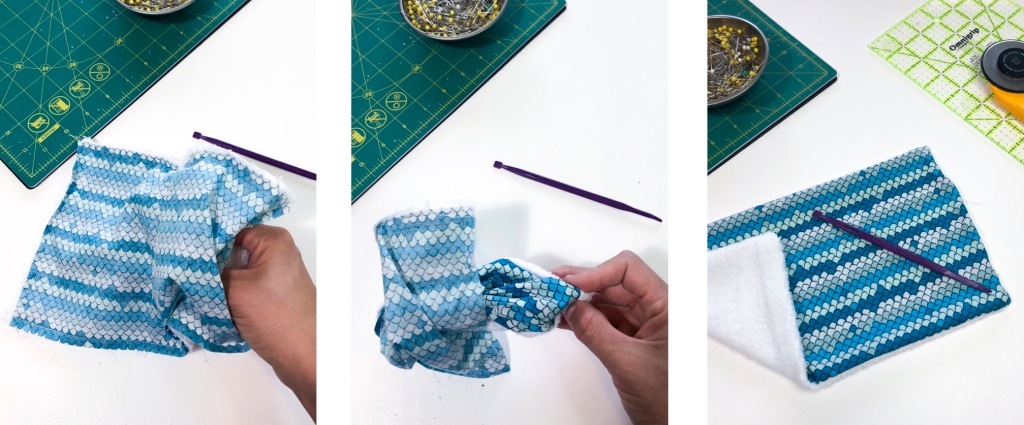
4. Now press with an iron to ensure flatness and straight edges.
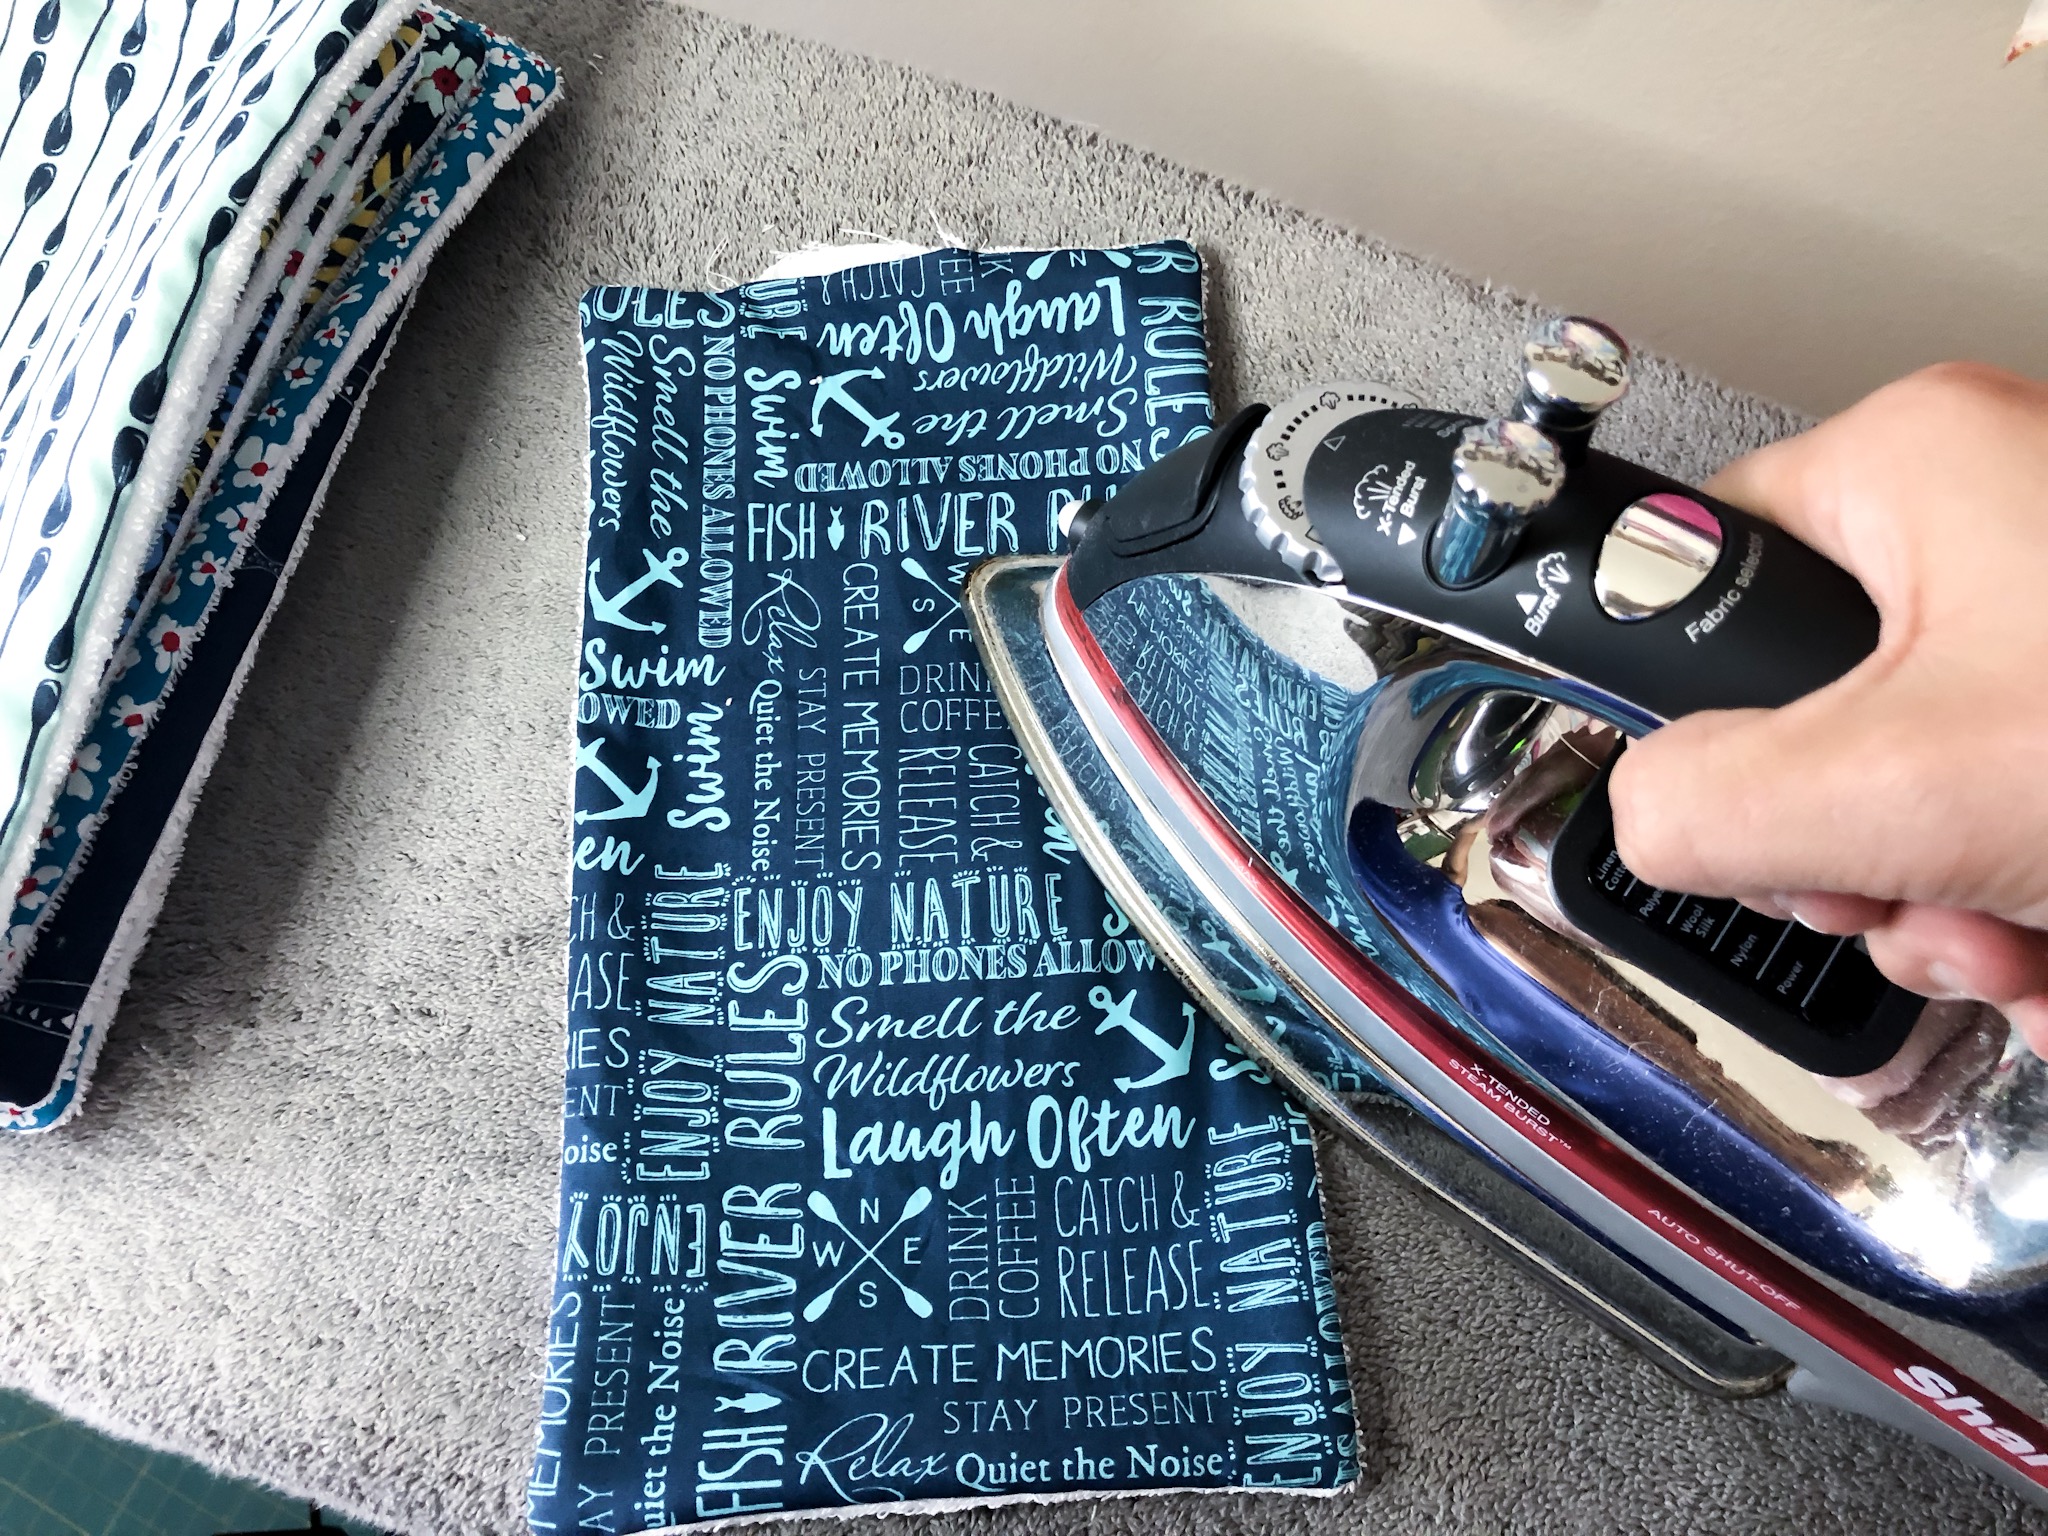
5. Next, sew a 1/4in. seam around the edges off each rectangle with coordinating thread since you will see it. This will also close your opening where you turned your fabric so make sure it is ironed so that the raw edge is turned under.
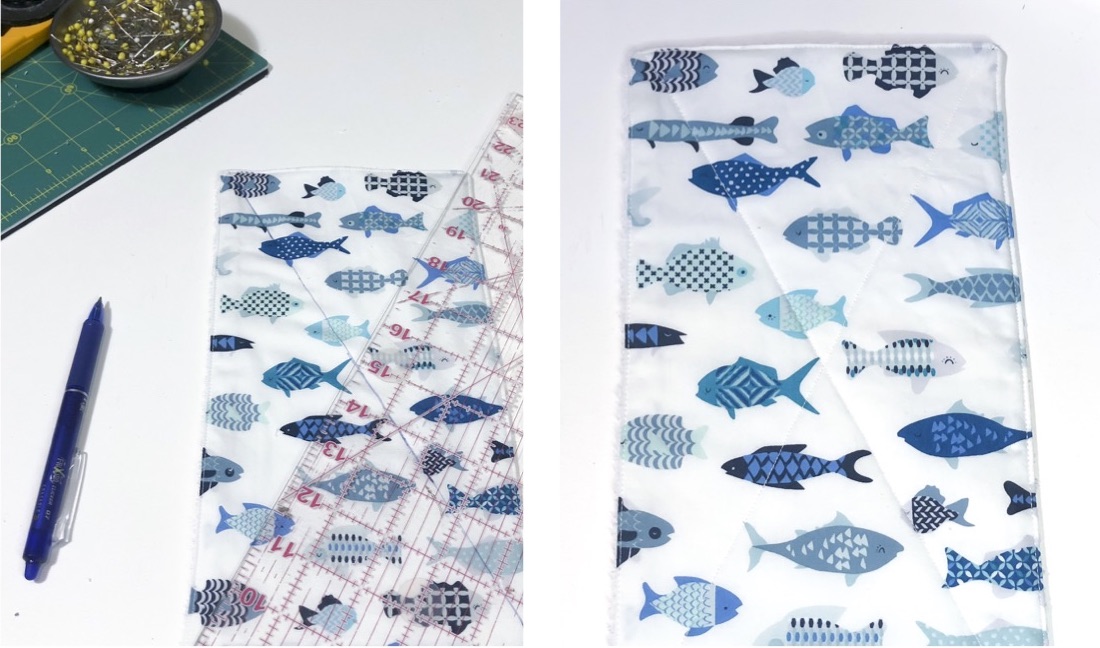
6. You will then need to mark with your Frixion pen a diagonal line going from corner to corner which will form an “X” on each rectangle
Sew over your lines quilting the 2 pieces of fabric together for extra stability. Press with an iron to remove the Friction pen lines when done
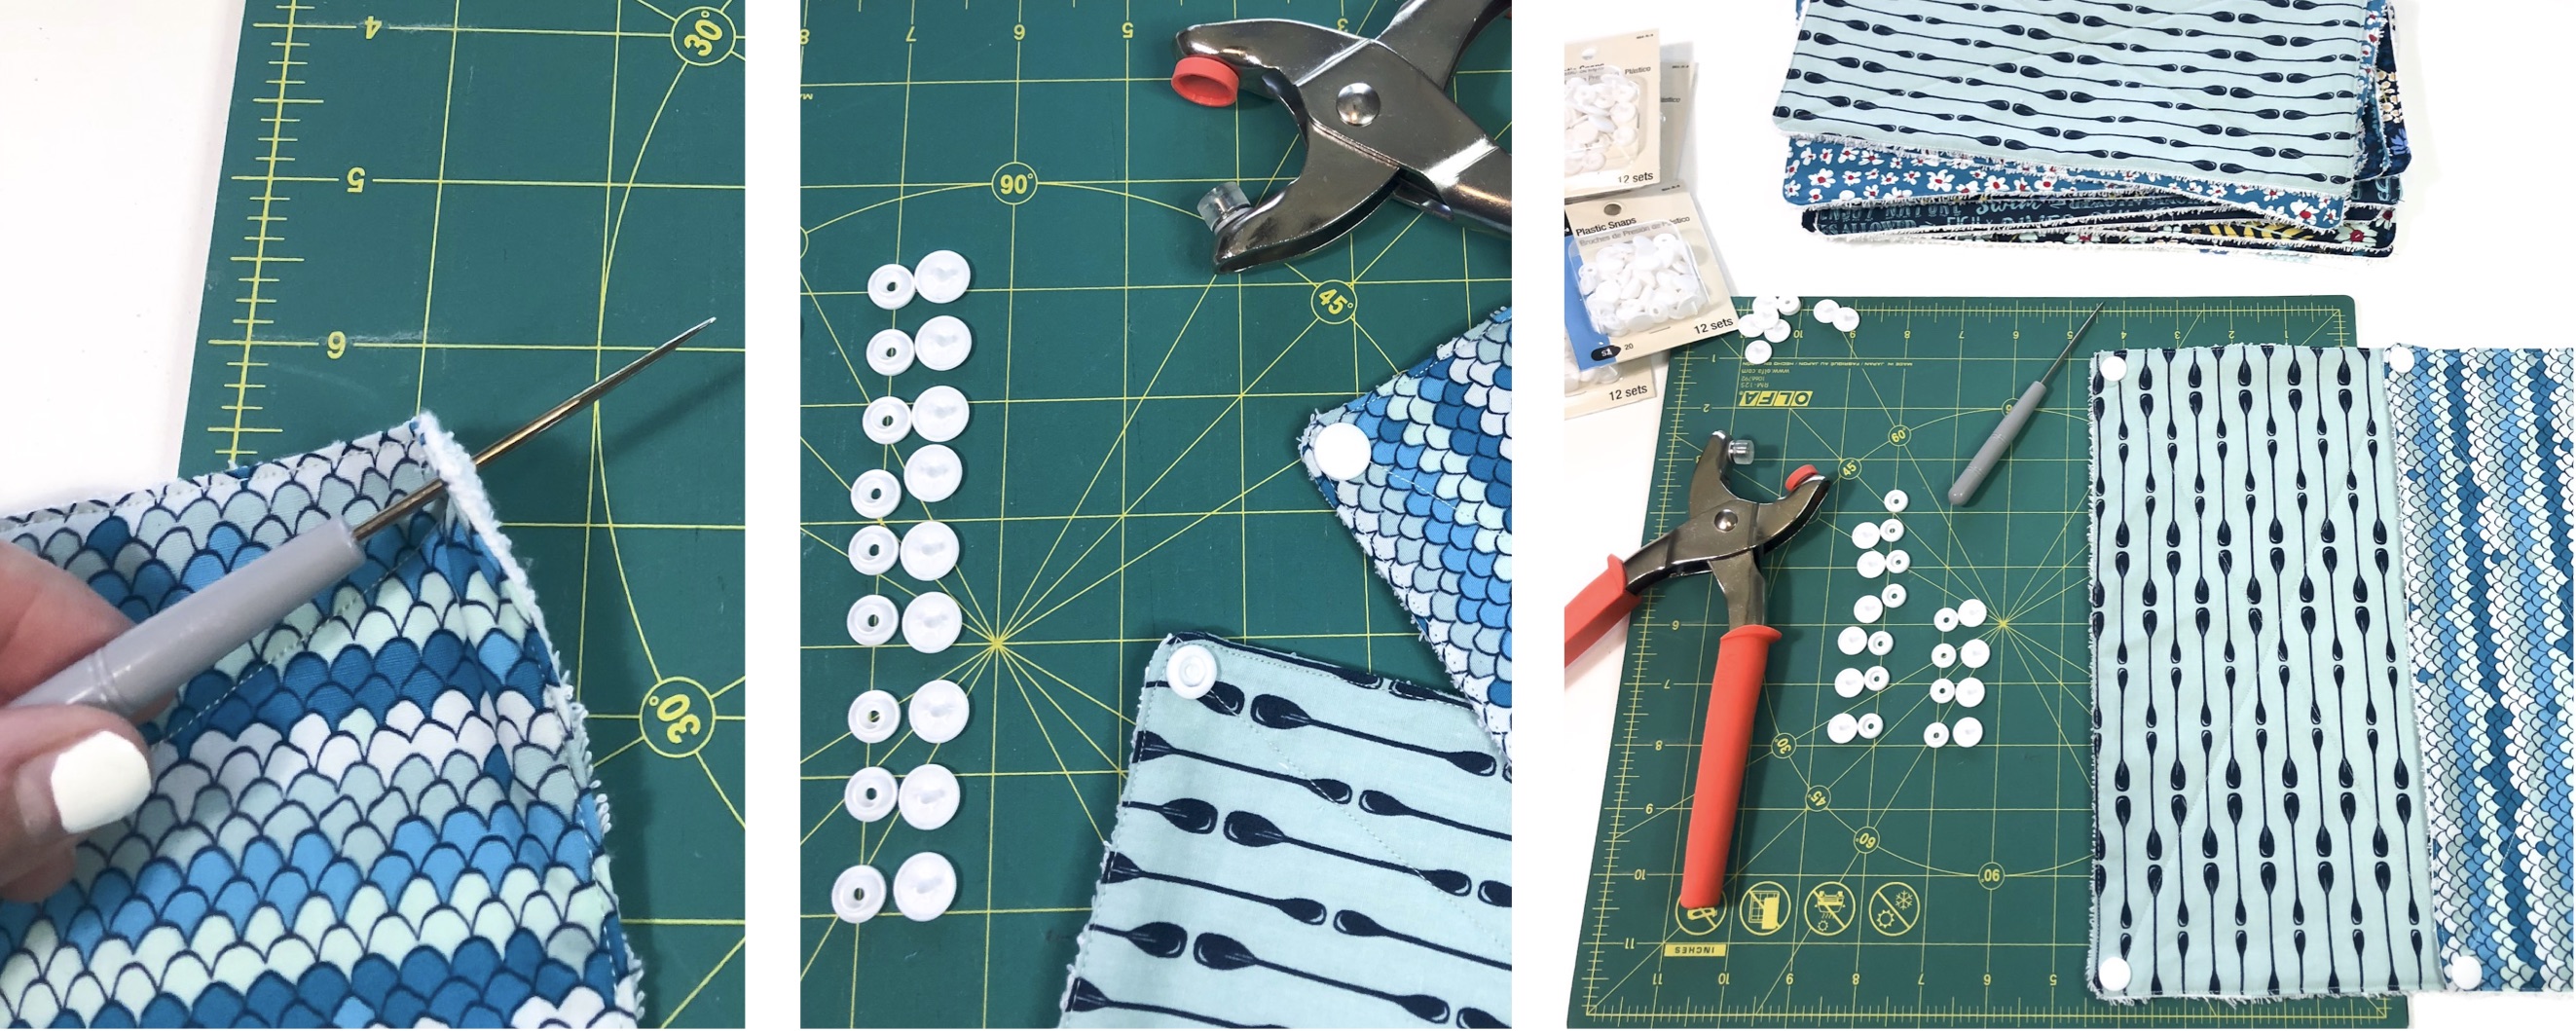
7. Next, you need to attach the plastic snaps begin by using the sharp tool that comes in the snap kit to poke holes in each of the corners.
Pro tip: Along your corners will be thicker since the seam allowance is there so punch the holes slightly down from the corners roughly 3/4in. so that you are only punching through 2 layers of fabric not 4. This will make it much easier when you begin to attach your snaps as they can not go through super thick fabric. You can use a ruler to ensure the same measurement on each corner so that the snaps line up evenly
8. You will then follow the directions in your snap kit on how to attach the snaps, alternating each side of the paper towel with the opposite snaps (since they are male and female) in order to allow them to snap together once rolled on the paper towel.
Pro Tip: We lined our snaps up first in two lines so that we could easily grab the ones we needed since they are so little and hard to identify. It saved us time and confusion.
9. Finally, attach all your fabric pieces together by snapping them to make a long strip and roll them around a paper towel holder.

10. Hurray you are done!! Now go enjoy your new un-paper towels!

Just throw them it the wash once you use one and snap it back onto the roll when clean! SOO EASY!!!
Enjoy!!! Be sure to tag us at @Catalinahomegrown so we can see all your makes!
♥Jackie and Amanda
